
OpenAI has opened up advertising inside ChatGPT. For years, search ads meant Google and social ads meant Meta. Now there is a third surface where people ask detailed questions, compare options and make decisions, and advertisers can place a sponsored message right below the answer.
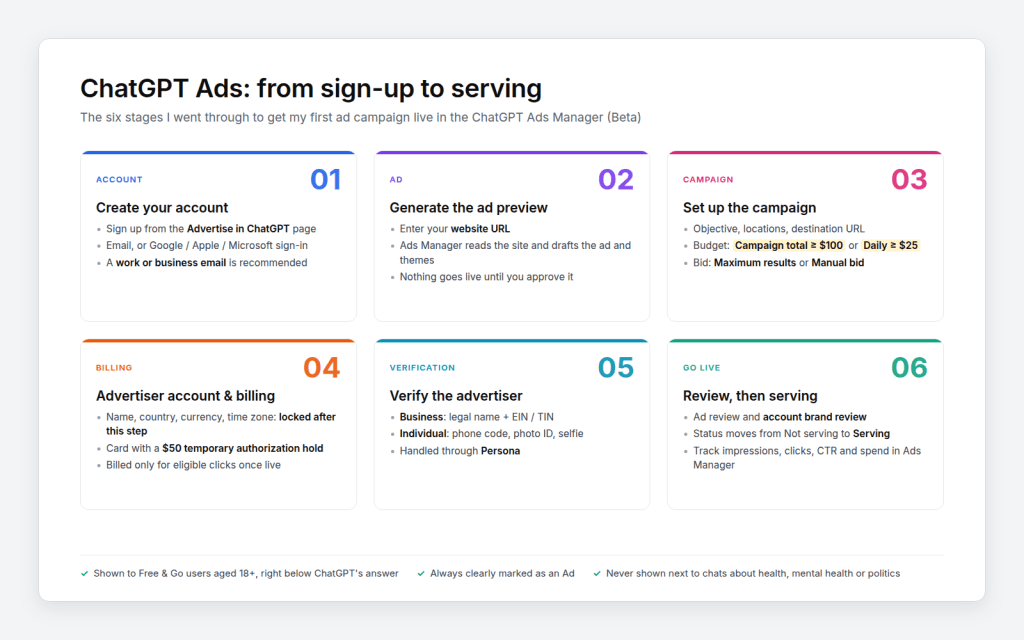
I decided to try it myself and run ads for my own blog. This is part 1 of a two-part series. Everything from creating the account to getting the first campaign ready to serve – billing, campaign setup, the ad itself, and verification. Part 2 will be a deep dive into using the Ads Manager once the campaign is actually running.
Step 1 – Start from the ‘Advertise in ChatGPT’ page
Think about it. People come to ChatGPT when they are exploring options, comparing choices, and making decisions. That is exactly the moment an advertiser wants to show up, not after the decision is made, but while it is being shaped.
When I signed up, there was also a launch offer at the top. Sign up before September 30 and get $500 in ad credit when you spend $500. Check the page for whatever offer is live when you read this.
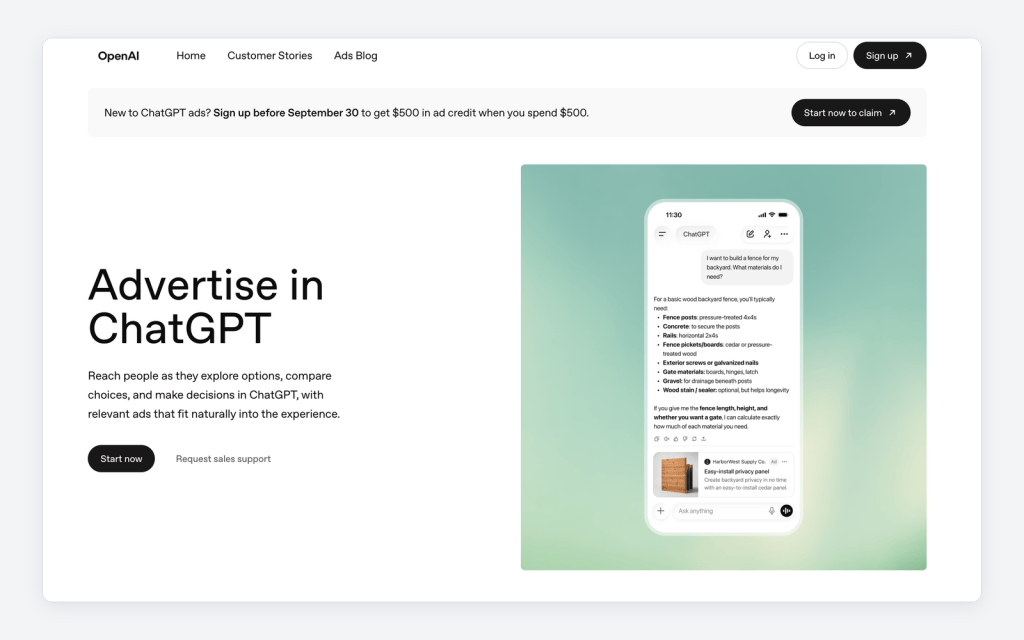
Click Start now to begin.
Step 2 – Create the account
The sign-up screen is the standard OpenAI account screen. You can use an email address or continue with Google, Apple or Microsoft.
Step 3 – Let Ads Manager generate the ad from your website
I found this as the most interesting part of the setup. Instead of asking you to write the ad first, Ads Manager asks for your website URL. It reads the site, builds an ad preview and then recommends a campaign. Nothing goes live until you approve it.
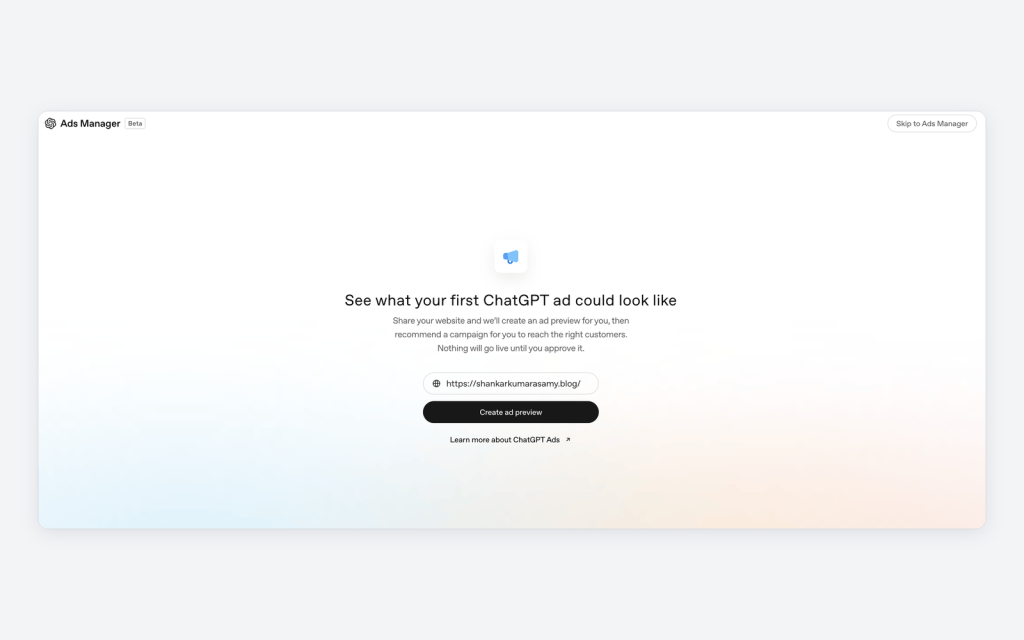
I entered https://shankarkumarasamy.blog/ and clicked Create ad preview.
It came back with a ready-made ad. It picked two themes that stood out across the blog – ‘Readers interested in AI infrastructure and enterprise AI architecture‘ and ‘People exploring AI transformation, API integration, and related technical topics‘, and built the ad around my most recent post on AI factories.
- Advertiser – Shankar’s Blog
- Headline – AI Factory Notes
- Description – Read about vertically integrated AI infrastructure.
- Image – The blog logo
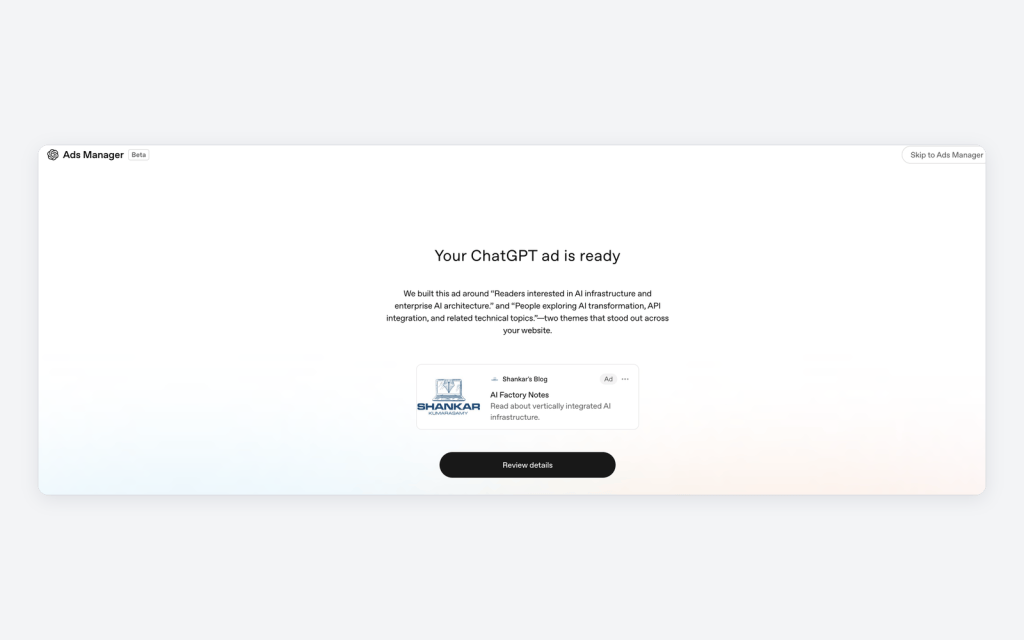
For a small advertiser who does not have a creative team, this is a very low-friction start. You can still edit everything in the next step.
Step 4 – Review the recommended campaign
Clicking Review details takes you to the recommended campaign. Out of the box, it suggested the below.
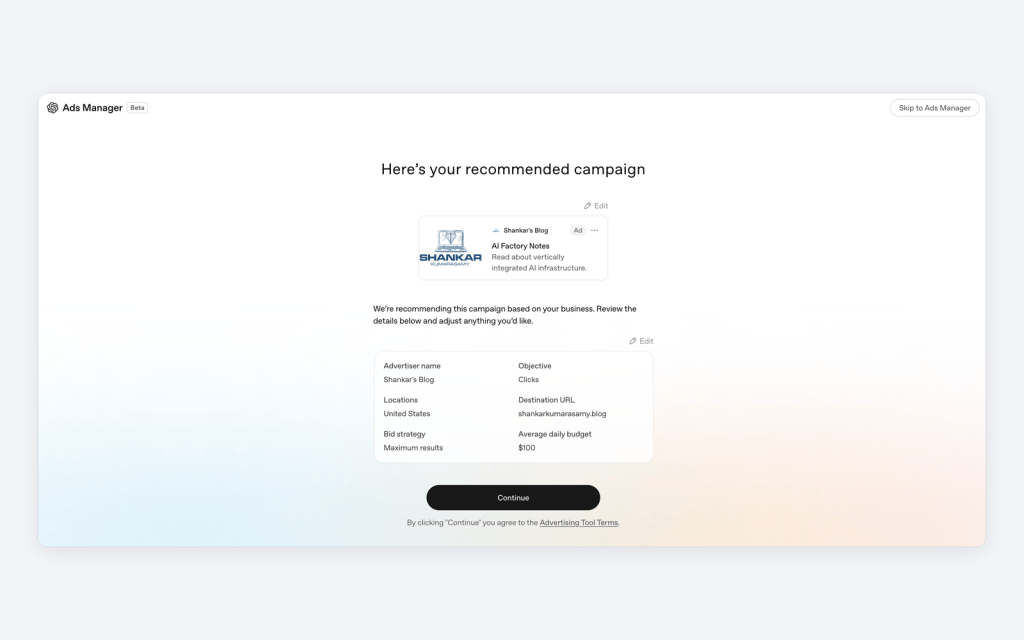
A $100 daily budget is a lot for a blog experiment, so I clicked Edit on the campaign details.
Step 5 – Edit campaign details. The different ways to set up the ad
This is the screen that matters most, because these choices decide how you bid in the ad auction and how your money is spent.
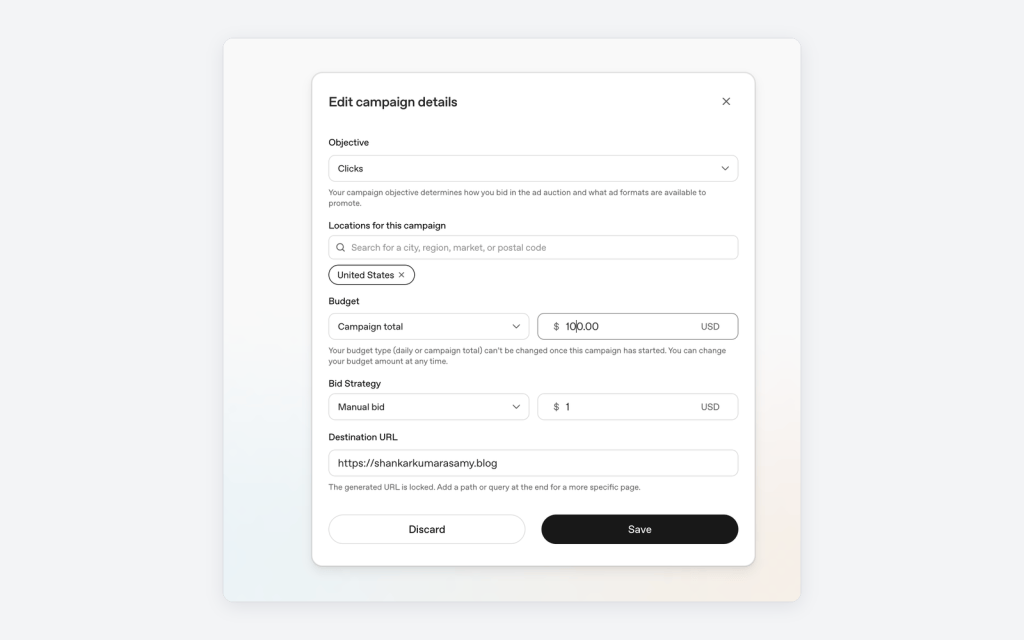
Let me go through each field.
Objective – The objective decides how you bid in the ad auction and which ad formats are available to promote. According to OpenAI’s help center, there are three objectives.
- Views (CPM) – Best for getting your ad seen by as many people as possible. You pay for every 1,000 impressions.
- Clicks (CPC) – Best for sending people to your website. You pay for each valid click.
- Conversions – Best when you want people to take an action on your site, like buying, signing up or filling a form. ChatGPT tries to show your ad to people most likely to take that action. You still pay per click (oCPC) or per 1,000 views (oCPM), not per sign-up or sale.
A couple of things to know about Conversions.
- It needs conversion tracking on your website first, using OpenAI’s Pixel and/or Conversions API, and you pick one of the supported standard events (custom events aren’t supported).
- The objective and the billing option can’t be changed after the campaign is created.
For my experiment, I stayed with Clicks. My goal was to get readers from ChatGPT to my posts, and paying per click keeps the cost easy to understand. The rest of this post follows the Clicks setup.
Locations – You can target a country, city, region, market or postal code. The recommendation defaulted to United States, which I kept.
Budget – There are two budget types.
- Campaign total – One fixed amount for the life of the campaign. Once it is spent, the campaign stops. The minimum for a campaign total is $100.
- Daily budget – An amount that can be spent each day, for as long as the campaign runs. Enter a daily budget of at least $25.00.
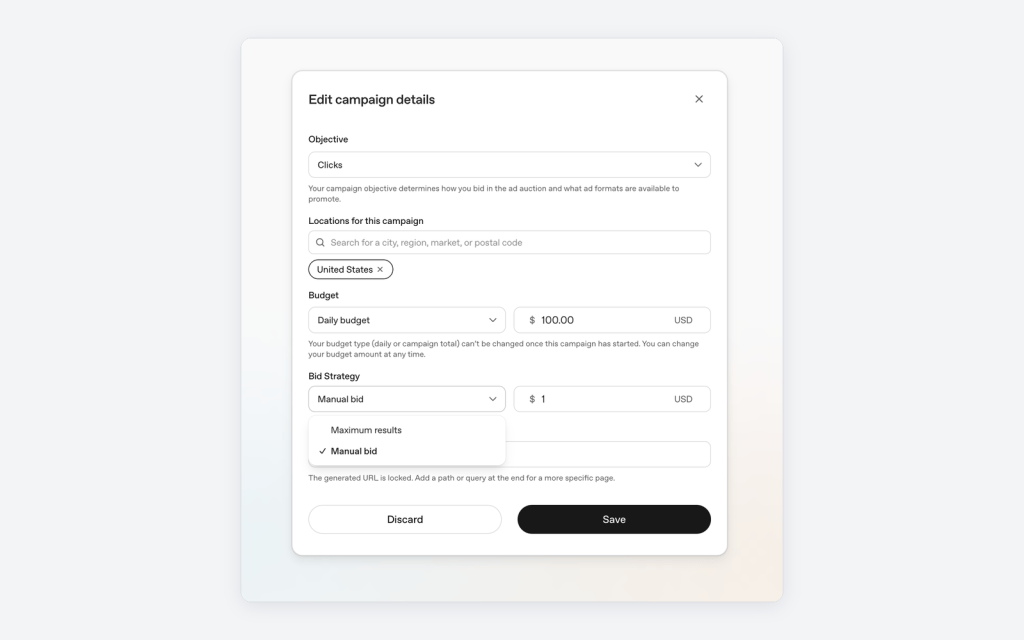
The budget type (daily or campaign total) cannot be changed once the campaign has started. You can change the amount at any time, but not the type. So decide this up front.
Bid strategy – The bid strategy options change based on the budget type you pick.
- Daily budget – You can choose between Maximum results and Manual bid.
- Campaign total – Manual bid is the only option.
What the two options mean?
- Maximum results – Ads Manager bids automatically to get as many clicks as possible within your daily budget. It is the easiest option when you have no idea what a click on ChatGPT costs. This is what the recommended campaign started with.
- Manual bid – You set the maximum you are willing to pay per click (I set $1). You get cost control, but if your bid is lower than what others are bidding for the same conversations, your ad may win fewer auctions and serve less.
Destination URL – The generated URL (your domain) is locked. You can add a path or query at the end to send people to a more specific page. This is a good place to add UTM parameters so you can track ChatGPT traffic in your own analytics.
Which combination are available to pic?
- Campaign total ($100 min) + Manual bid (only option) – A fixed, bounded test where you also cap the cost per click. My choice for this blog.
- Daily budget ($25/day min) + Maximum results – An always-on campaign where you want volume and trust the system to optimize.
- Daily budget ($25/day min) + Manual bid – An always-on campaign where you know your target cost per click.
I went with Campaign total of $100 and Manual bid of $1. It keeps the experiment bounded. The most I will spend is $100, and every click costs me at most $1.
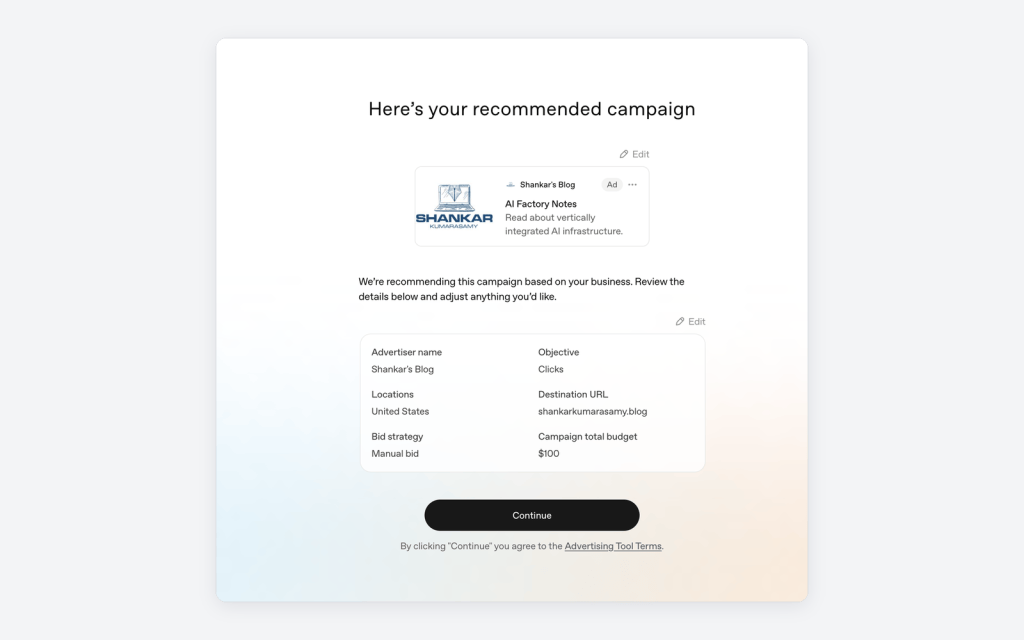
Clicking Continue to agree to the Advertising Tool Terms.
Step 6 – Set up the advertising account
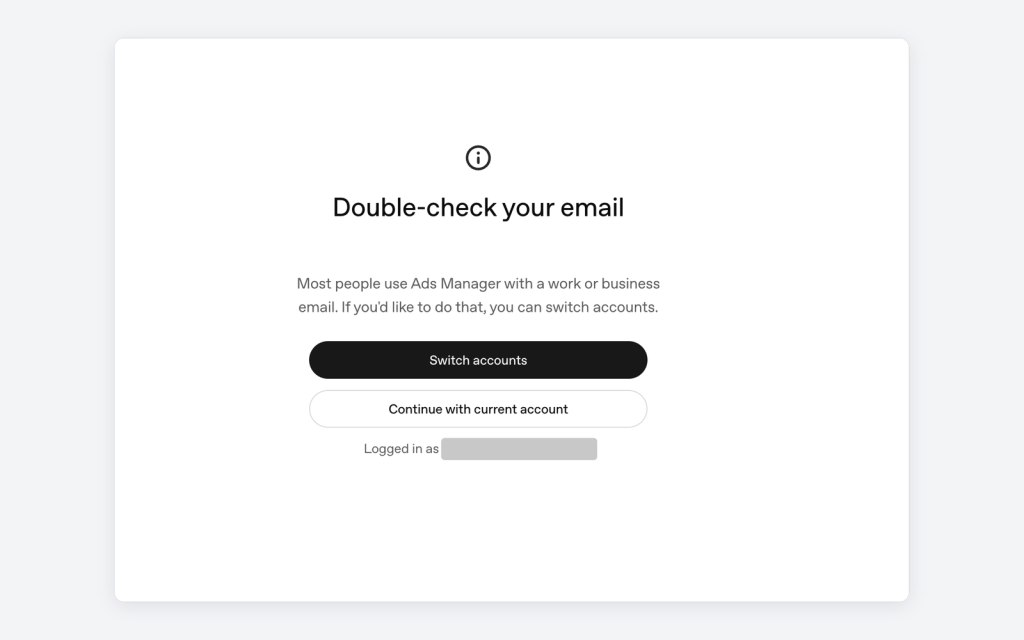
Before billing, Ads Manager checks the email. Most people use Ads Manager with a work or business email, and it gives you the option to switch accounts. I continued with my current account.
Next you confirm the advertising account details that are used for billing and reporting like Account name, Country/Territory, Currency and Time zone.
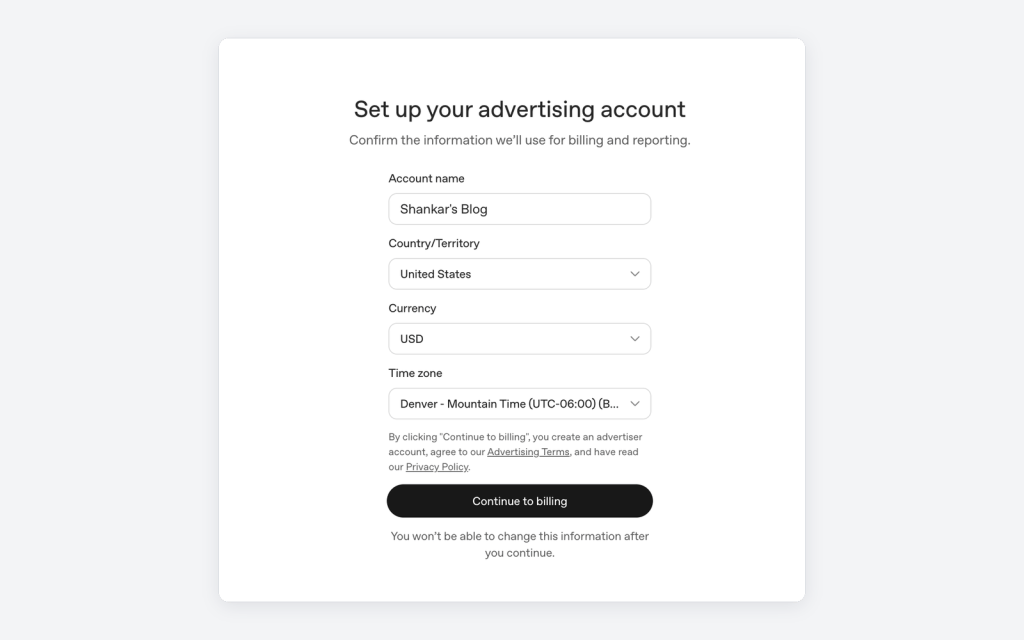
You won’t be able to change this information after you continue. Pick the correct currency and the time zone you want your reports in.
Step 7 – Billing
- You are only billed for eligible clicks after your ad is approved and starts running.
- OpenAI places a temporary authorization hold of $50 USD on your card. Your bank may take 8 days or longer to release the hold.
- You can Save and finish later if you are not ready to launch.
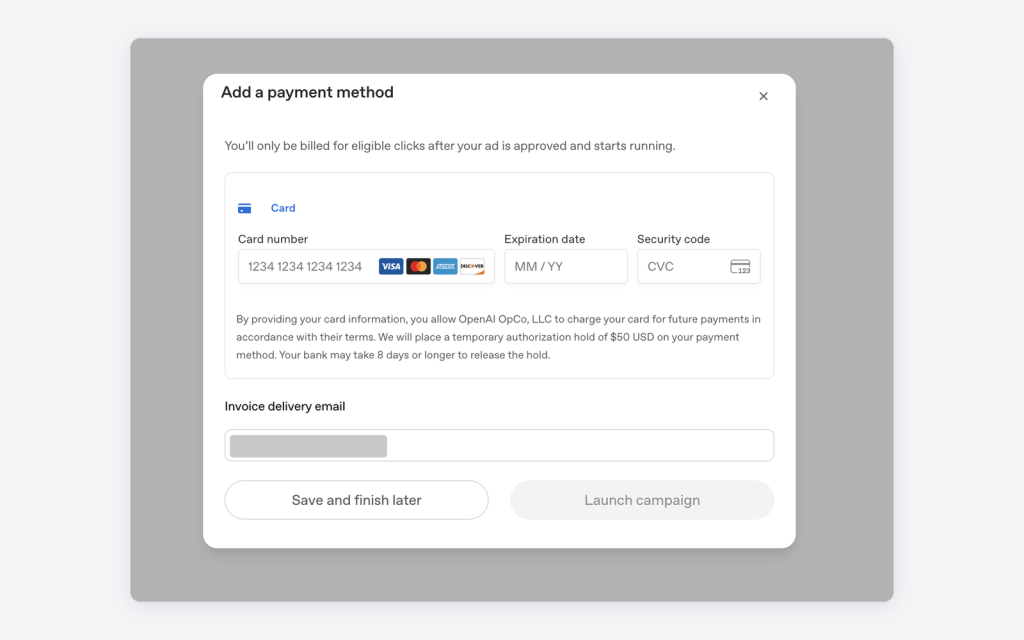
Click Launch campaign. Ads Manager creates the campaign and takes you into the main Ads Manager view.
Step 8 – Ad review
Right after launch, the ad goes into review. You won’t be charged until the ad starts running.
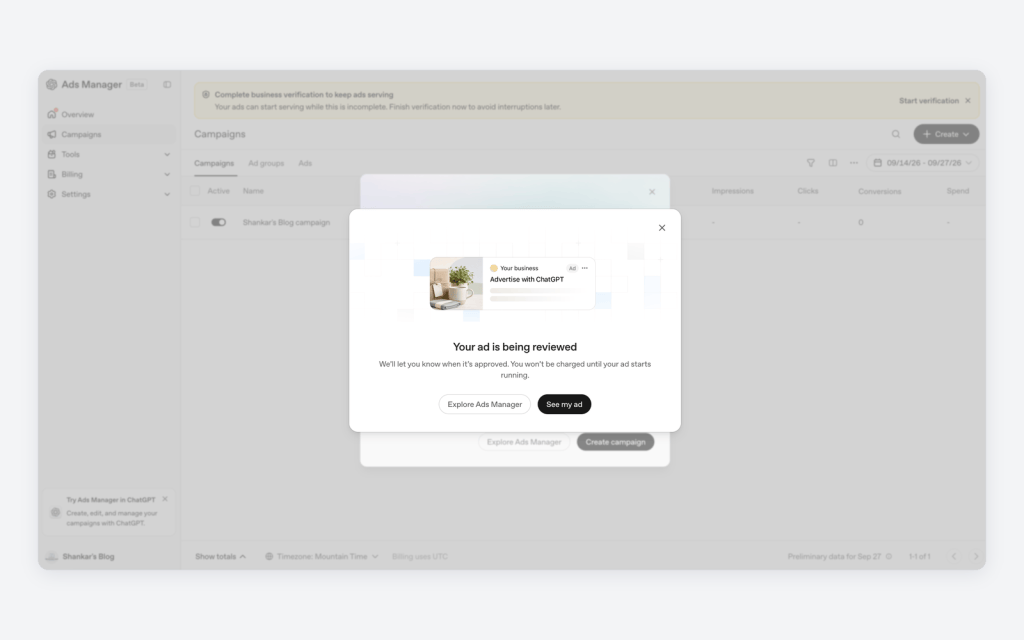
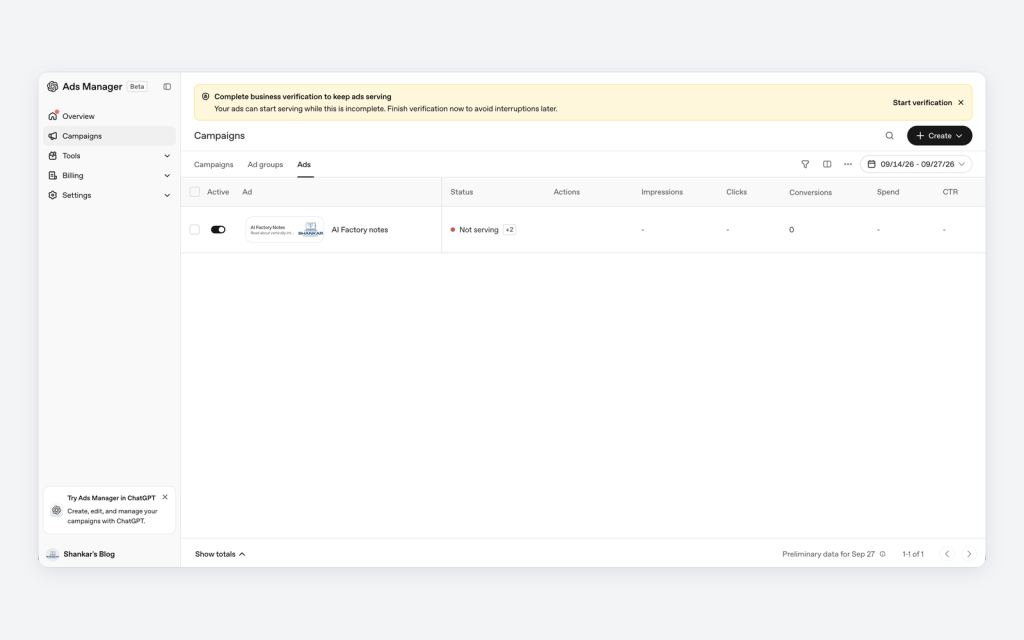
Notice the yellow banner at the top, Complete business verification to keep ads serving. Your ads can start serving while this is incomplete, but you need to finish verification to avoid interruptions later.
In the Ads tab, my ad ‘AI Factory notes’ showed Not serving at this point.
Step 9 – Advertiser verification
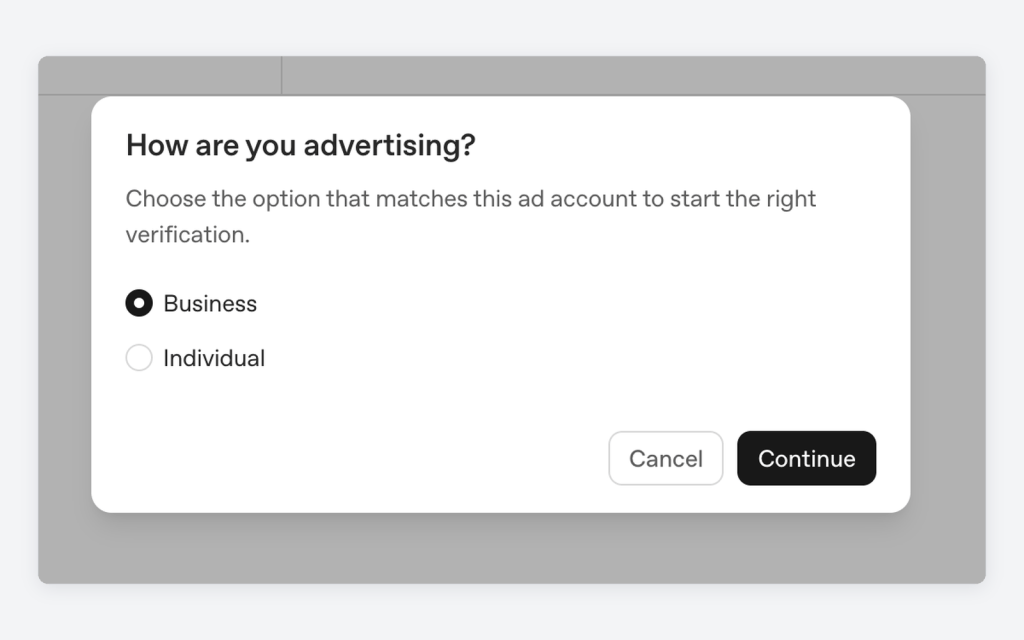
Click Start verification on the banner. The first question is how you are advertising. There are two paths.
Option A – Business
Choose business when you are advertising on behalf of a registered company or organization, and you can provide its legal business name and registration or tax ID (EIN / TIN). The verification is handled by Persona, OpenAI’s verification vendor, and OpenAI says the account information it shares with Persona is stored for no more than 30 days.
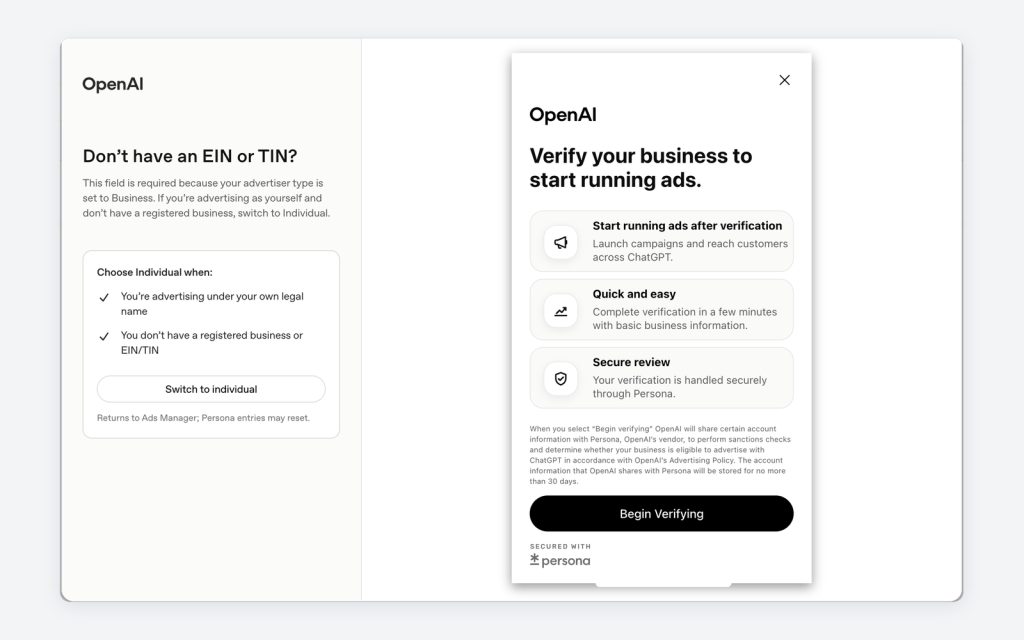
If you do not have an EIN or TIN, the screen itself suggests switching to Individual.
Option B – Individual
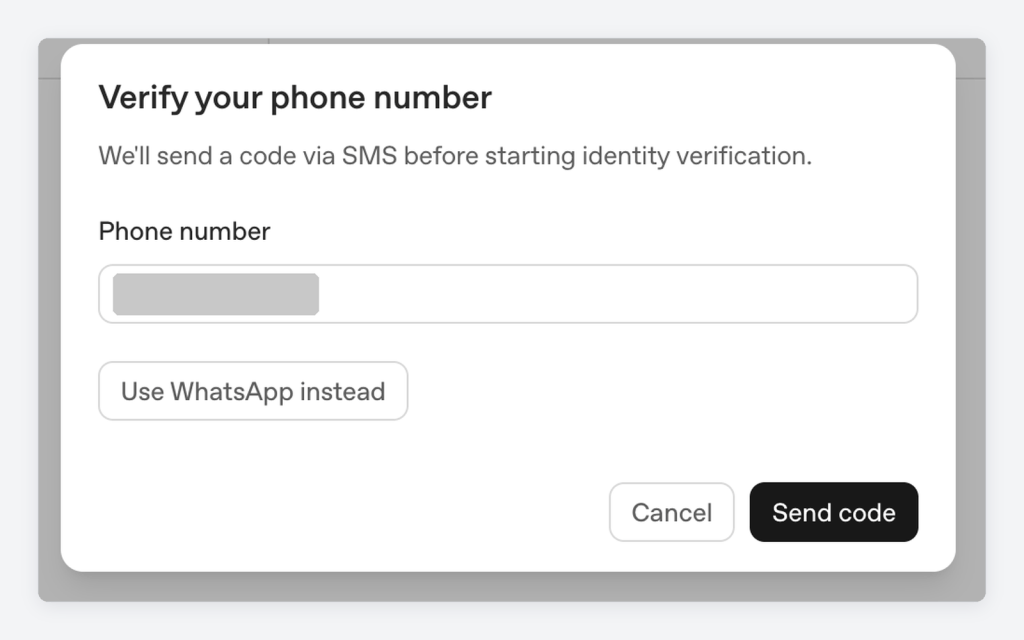
1. Verify your phone number – A code is sent by SMS (or WhatsApp) before identity verification begins.
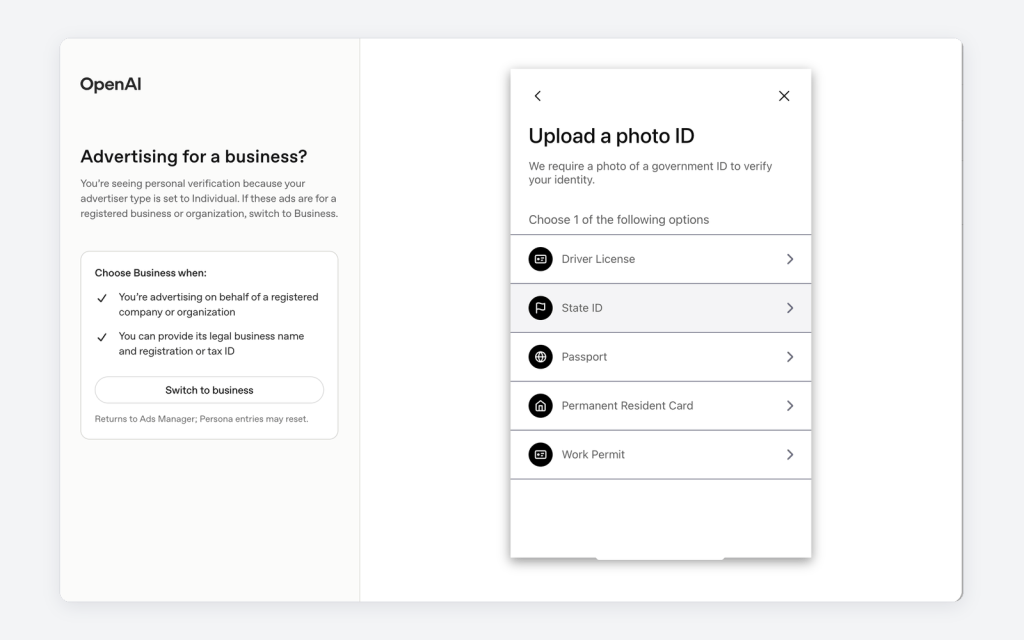
2. Upload a photo ID – Choose the country of your ID and then one of – Driver License, State ID, Passport, Permanent Resident Card or Work Permit. You can take the photo on your computer or continue on another device, like your phone.
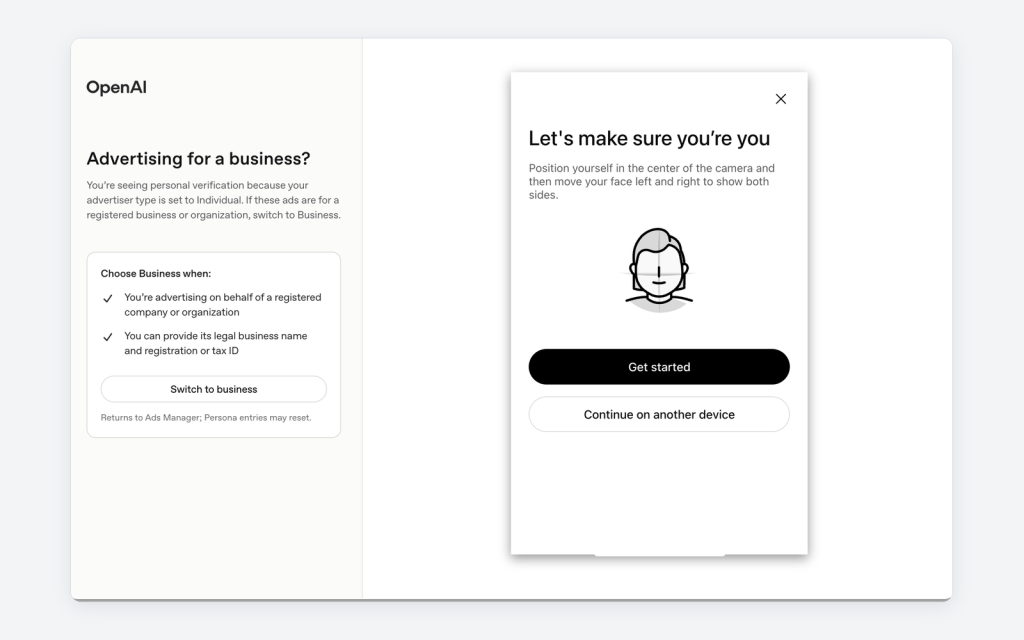
3. Selfie check – Position yourself in the center of the camera and move your face left and right to show both sides.
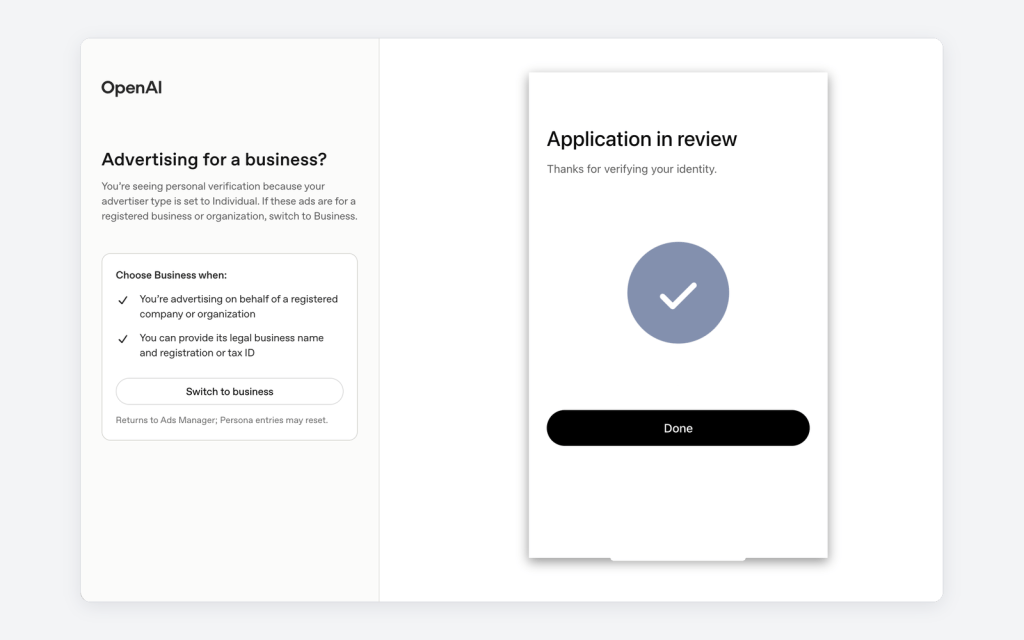
4. Application in review – That’s it for the individual flow.
Step 10 – Account brand review
Back in the campaigns view, the campaign still showed Not serving. Hovering on the status explains why? Account brand review in progress. Campaigns and ads can serve only after the brand review is approved.
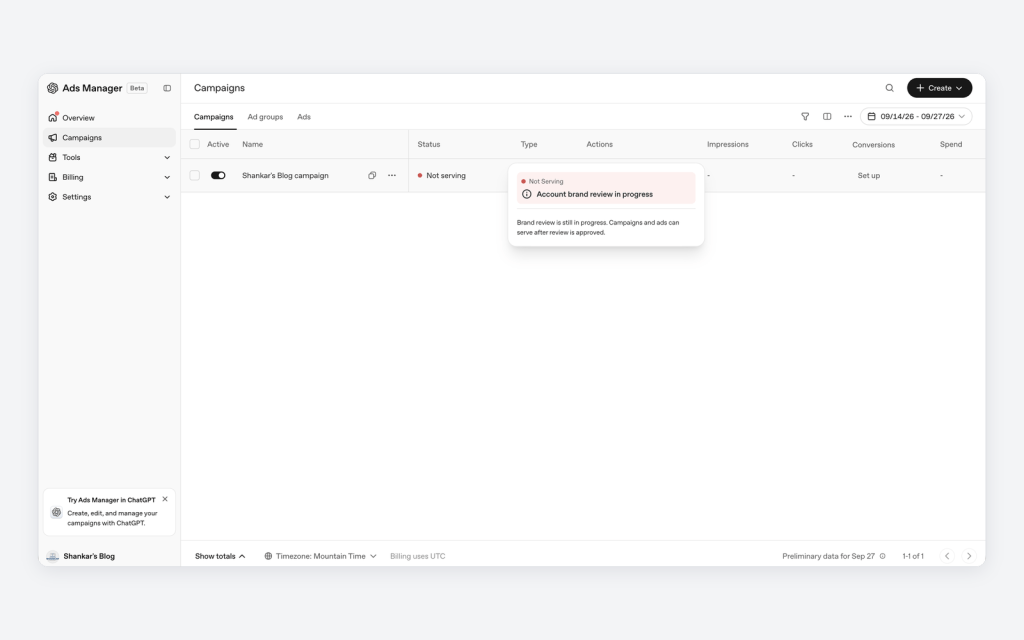
So there are really three checks before the ad goes live.
- Ad review – Is the ad itself compliant?
- Advertiser verification – Who is behind the account (business or individual)?
- Account brand review – Is the brand/website eligible to advertise in ChatGPT?
Step 11 – The campaign is live
The campaign was approved and started serving on September 29, 2026. I initially submitted on September 27, 2026. It took 2 days for my campaign to get approved from the scratch. The status changed from Not serving to Serving.
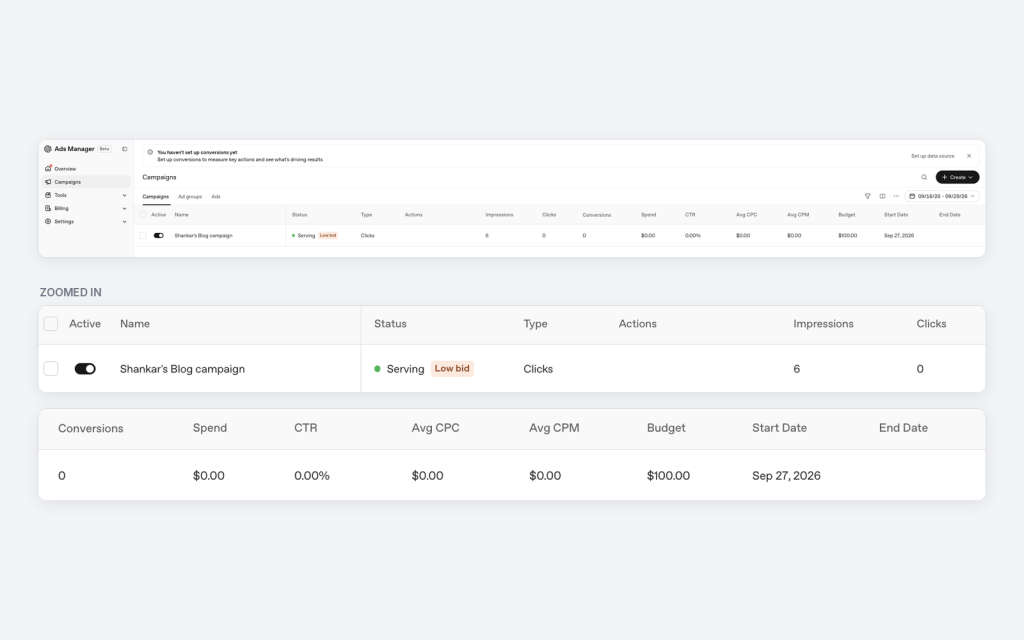
Here is what the first numbers looked like.
- Status – Serving, with a Low bid tag next to it
- Impressions – 6
- Clicks – 0, so Spend is still $0.00 (you only pay for clicks with a Clicks objective)
- CTR, Avg CPC, Avg CPM – 0.00% / $0.00 / $0.00 – nothing to calculate yet
- Budget – $100.00 campaign total
Two things that I wanted to highlight.
- Low bid – Ads Manager is flagging that my $1 manual bid is on the low side. With a manual bid, the ad only wins auctions where $1 is competitive, which is likely part of why impressions are low so far. Raising the bid should help the ad win more auctions. This is the trade-off of Manual bid I mentioned earlier.
- ‘You haven’t set up conversions yet’ – The banner at the top suggests setting up a data source (Pixel or Conversions API). It isn’t needed for a Clicks campaign, but it is what you would need for the conversions objective.
Where the ad actually shows up?
This is what a ChatGPT user sees. Someone asks about AI factories, and below the end of the answer, my sponsored ‘AI Factory Notes’ card appears, clearly labeled Ad. The image below is an illustration. With my bid set so low, I couldn’t spot my own ad in ChatGPT. I was a little hesitant to raise the bid just to grab a screenshot when I could easily have AI illustrate it for me 🙂
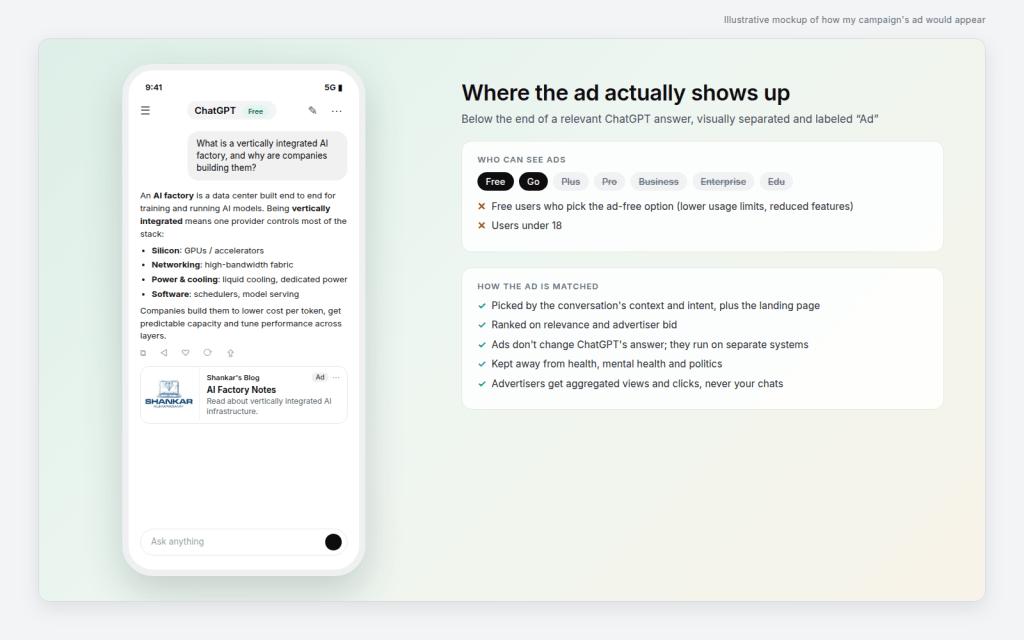
Another important detail that I noticed, not every ChatGPT user will see your ad. Ads are shown only to adult users on the Free and Go plans. Users on Plus, Pro, Business, Enterprise and Edu don’t see ads. Free users can also choose an ad-free option that comes with lower usage limits and reduced feature. Those users won’t see your ad either.
How ads show up in a longer chat?
- Each answer is a separate chance for an ad. The ad sits below the end of a response, so the decision is made per answer, not once per chat.
- Not every answer gets an ad. Independent studies in mid-2026 found ads on roughly a quarter of shopping-type questions, and the same question can show an ad in one chat and none in another.
- One ad at a time. When an ad shows, it is a single sponsored card with no competing ad next to it.
- The whole conversation counts. OpenAI picks ads based on the context and intent of the current conversation, so a follow-up question can bring up an ad related to something discussed earlier in the chat.
- Sensitive turns get no ads. If the chat moves to personal health, mental health or politics, ads aren’t eligible there.
- No published limit per chat. OpenAI hasn’t said how many ads can appear in a single conversation.
Overall, high level summary of the learning.
- Setup is quick – The website-to-ad preview removes most of the creative work.
- Three objectives – Views, Clicks and Conversions (needs Pixel / Conversions API). I used Clicks.
- Minimums – $100 for a campaign total or $25 per day for a daily budget.
- A campaign total budget works only with a Manual bid. Maximum results is available only with a daily budget.
- Decide the budget type up front. It cannot be changed after the campaign starts.
- Account name, country, currency and time zone are locked after setup.
- A $50 temporary authorization hold is placed on your card. You are only billed for eligible clicks once the ad is running.
- Three checks before serving – ad review, advertiser verification (Business or Individual) and account brand review.
- My campaign went live on September 29, 2026 after 2 days of wait time to get the ad campaign approved by OpenAI. A Low bid tag showed up with the $1 manual bid.
- Ads reach Free and Go users only, never paid-tier, ad-free or under-18 users.
Share your learning and experience on ChatGPT Ads.
Happy learning!


Thanks for writing up the three separate checks. Ad review, advertiser verification and brand review explain why a new campaign can sit at “Not serving” for a couple of days without anything actually being wrong.
On the Low bid tag: OpenAI’s developer docs for the Ads API (the Bidding & Budgets page) describe switching a campaign from a lifetime budget to a daily budget, which is the step needed before Maximize clicks can be used. Only that direction works; going from daily to lifetime means a new campaign. If Ads Manager offers the same switch, it might be a cleaner test for Part 2 than guessing at a higher manual bid. One thing to know before moving to the $25/day option, though: OpenAI’s help article on daily budgets treats the daily amount as an average over seven days, so a single day can spend up to twice it (up to $50 on a $25 budget), while the seven-day total stays capped at seven times the daily budget.
Did the Low bid tag disappear once you raised the bid, and what did the first clicks end up costing?
LikeLike